
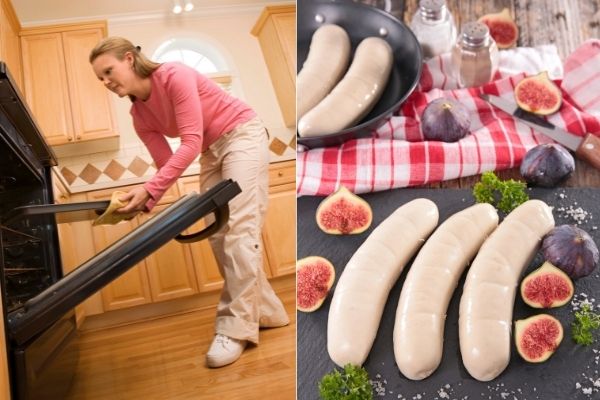
Knowing how to cook bratwurst in the oven is a crucial tool to have in your brat cooking arsenal for those times when grilling brats is impossible.
Our favorite recipe is for beer brats that are boiled and then finished off on the grill but the below recipe for cooking bratwurst in the oven is a very close second.
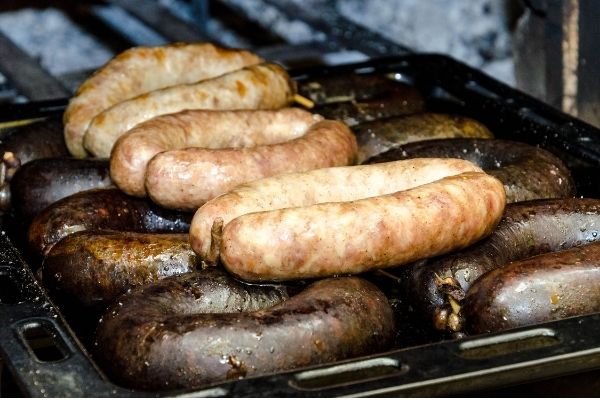
Most bratwurst recipes for cooking bratwurst in the oven have you go the quick and simple route of cooking them in a broiler pan.
That’ll produce a perfectly fine brat but we prefer the dutch oven method below as it adds more flavor and you can cook your sides at the same time.
How to Cook Bratwurst in the Oven – the Simple Method
If you’re craving bratwurst and want a quick and easy brat, the broiler method will likely be your best bet.
This recipe couldn’t be simpler. Turn you oven to the broiler setting and let it preheat.
Put your uncooked brats on a broiler pan and pop them in the oven, cooking them for about five minutes at a time on each side.
Keep turning them until they brown up nicely and are good to go.
This should take 15-20 minutes for uncooked brats and just 5-10 minutes for precooked bratwurst.
The Dutch Oven Method for Bratwurst in the Oven
This baked bratwurst dish is our personal favorite and our go-to recipe when asked how to cook bratwurst in the oven.
Lightly grease your dutch oven and mix up a little olive oil and stone ground mustard in a bowl. Roughly chop up two large onions.
Add your brats and small potatoes (fingerlings or new potatoes or small red potatoes all work well) to the dutch oven and cover with onions.
Pour the olive oil and mustard over it and lightly toss. (You can also add about one-third of a can of beer, although it will tone down the mustard some.)
Bake at 400F for about an hour, stirring it up every 20 minutes or so.
Enjoy your amazing bratwurst goodness and pat yourself on the back for now knowing how to cook bratwurst in the oven!
Best Bratwurst to Cook in the Oven
There’s really no such thing as a bad brat but there are definitely better ones than others. Always try to cook your bratwurst recipes with fresh local brats as it really does make a difference.
Kewauskum, Klement’s, and Usinger’s are some of the best bratwurst makers in the Midwest but their brats and sausages can be hard to find in some areas.
If you don’t have access to any good bratwurst locally, Wisconsinmade.com is one of the most popular companies that sells genuine Wisconsin brats online and ships them all around the country.
Adventurous souls can even make their own bratwurst, as it’s not that difficult once you have a good meat grinder and sausage stuffer to work with.
How Long to Cook Brats in the Oven?
A brat is a delicate form of meat. A little touch under or over it will leave you with an ill-flavored dish.
The most significant advantage of cooking a brat in the oven is the ‘enclosed space.’ This enclosed space holds the heat produced by the oven inside and results in faster cooking.
Two temperatures are most often used for brat oven cooking-
At 225℉ (107℃)
This smoking temperature used for brat oven cooking is the aptest temperature for BBQ fans to get the smoky murky flavor.
‘Super Smoking’ is also a term used for this method of brat cooking. The total time duration of smoking is 2 hours.
- Preheat the oven at 225℉ for a minimum of 45 minutes.
- Place the brats into the oven with the help of tongs. Directly below it, put a container with the wood chips. The wood chips burn, producing a reddish tint that develops on the brats with a hardness on the exterior.
- Set the oven to ‘Super Smoke’ in the latest convection ovens or set the temperature directly to 225℉ in older ovens.
Here are some key tips which you can use:
Avoid poking to the brats so that the moisture and fat essential for the taste do not ooze out and leave bland dried-out brats to eat.
There are various wood chips for different flavors: hickory for a strong sense of smokiness, pecan instead of hickory, or apple for a milder tone.
Slow and low smoking is much preferred over fast and high smoking. Also, the latter causes casing-bursts which are not very delectable.
No flipping is needed.
The skin will not that crispier as in grilled brats.
To be sure whether you have the best-smoked brats or not, use a ‘meat thermometer.’ Feel the dense part of a smoked brat with your hand and poke the thermometer into it. This thermometer records the internal temperature of the smoked brat.
For the meat to be cooked to its perfection, the internal temperature should be 165℉. If the temperature on your cooked brats is 160℉ (76℃), rest assured you have yourself a tray of delicious brats.
If you want to enhance the flavor of your smoked brats to an even higher level, beer baths are for you.
Prepare a beer bath, which is just basically warmed-up beer in a container. You can warm the beer in the oven where the brats are being smoked. You do not need to warm the beer separately.
Once smoking has been completed, soak the freshly smoked brats in the beer bath. The smoked brats will immediately absorb the beer from the container. The process will multiply the juiciness of the smoked brats.
Let the brats rest for 5 minutes with a loosely draped foil over it. Draping will help the juice distribution in the brats, which had gathered at the center due to smoking.
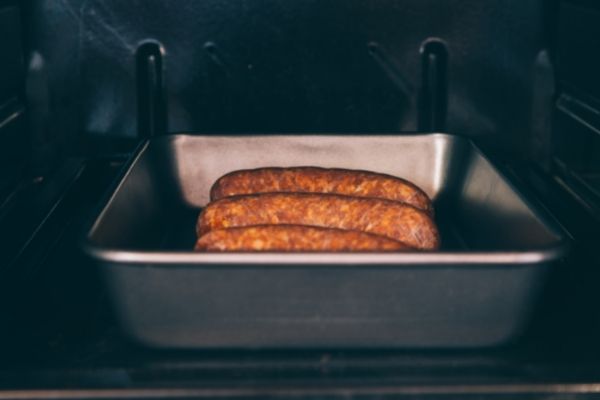
At 350℉ (176℃)
It is the conventional temperature used for brat oven cooking. Often, it is directly set or opted after the earlier mentioned smoking procedure.
Place a sheet of aluminum foil or parchment paper and pinch the edges to keep it in place in the baking tray. It will save the hassle of scrubbing the baking tray after cooking and keeps the brats from sticking to the bottom of the baking tray.
You can also use a cookie sheet or a casserole dish if you don’t have a baking tray. Also, whatever you choose, it should have at least 4-6 inches rims all around. It is to make sure the brats or their juices don’t fall off when put in or taken out of the oven.
Put the brats in the tray while maintaining even spacing between each of them. A single layer ensures they do not clump over one another.
Clumping results in uneven cooking of the brats and may even result in raw/undercooked meat.
- Place the ready baking tray aside.
- Preheat the oven at 350℉.
Preheating guarantees uniform baking of the brats. Moreover, a crisp or a sear layer is formed when the brats are placed in a preheated oven.
- Put the prepared baking tray into the preheated oven.
- Close the lid.
- Set the temperature on the oven at 350℉.
Please note that shorter/thinner brats require less time, while longer or thicker brats require more time.
So always cook one size at a time. It is better to divide the brats into two batches to avoid burning the shorter ones or undercooking, the longer ones.
It will be a bit difficult to do because of the longer time duration required. But, it is better to give the brats the time and care for the best outcome rather than rushing and ending up with a disaster.
The total time from start to finish is roughly around ’45 minutes’ to ‘1 hour’.
- Let the brats cook for at least 7 minutes.
- Check the brats at the end of 7 minutes whether they have cooked thoroughly one side or not. If they have not, then give them an extra 3 minutes.
- When 10 minutes have been completed and satisfied with the cook of the side on the tray, flip them carefully with tongs.
- Repeat the waiting of 7 minutes, and then an extra 3 minutes if the other side has not cooked properly.
The latest convection ovens are at the top, and in older ovens, it has a different compartment at the bottom.
After setting the rack, preheat the broiler for about 10 minutes.
It will either have an on/off button or a low/high setting. Switch it on or set it on high.
- Place a tray below the rack to collect any juice that may fall from the broiling brats.
- Put the cooked brats onto the broiler.
- Close the lid of the oven.
- After 5 minutes, with extreme care, open the lid, pull the rack out, and flip them.
- Wait another 5 minutes for the other side to get broiled.
Remove the cooked brats from the oven and place them on the counter with a heat-safe mat below it or directly onto a switched-off stove.
Perfectly cooked brats have golden-brown skin to them. This color even acts as an indicator of whether the brats have been cooked or not.
You can cut the cooked brats breadthwise and see if it has cooked or not. The middle of it should be blush pink and not a darker pink.
Alternatively, with your tongs, hold a brat and give it a slight jerk or shake. If it wiggles like a jelly, it is still not cooked; and if it doesn’t, i.e., stays firm, then they are cooked.
How Long to Cook Chicken Brats in the Oven?
Chicken Brats are often referred to as ‘Chicken Sausages.’ Perfect for breakfast or a quick snack. Juicy and succulent when cooked at the right time for the right temperature. Ground chicken meat is used to make them.
Steps to cook chicken brats in oven
- Arrange the Chicken Brats in a single layer in a baking tray, sprayed with a non-sticky liquid.
- Preheat the oven at 350℉.
- Put the arranged Chicken Brats into the preheated oven.
- Continue cooking the Chicken Brats at 350℉ for 20 minutes and flip them once at halftime, i.e., 10 minutes for even cooking.
- Give them an extra 5 minutes if you are not sure about the color they have turned out to be.
- If you want to broil, then add another 10 minutes to the cooked Chicken Brats.
- At the end of the cooking time, pull out the tray.
- Check the internal temperature to ensure they are not raw inside.
- Serve them hot with the delicious vegetable skillet along with it.
How to Cook Different Types of Brats in the Oven?
Johnsonville Brats
A Recipe – Johnsonville Cannelloni
Italian cuisine is always lip-smacking. The Johnsonville Brats are the best for mushroomy-cheesy goodness to excite your olfactory senses. One bite, and you will be going for seconds.
Cooking Time: 60 -70 minutes
Serving Size: 4-6
Ingredients
- Johnsonville Brats – 1 pack – crumbled
- Onion – 1 – diced
- Mushrooms – 2 – diced
- Egg yolks – 2
- Olive oil – 2 tablespoons
- Mozzarella Cheese – 2 cups – grated
- Parmesan Cheese – 2 cups – shredded
- Butter – 1 cube
- Flour – 1/2 cup
- Non-skimmed milk – 3 cups
- Cannelloni Shells – 10-12
- Oregano – dried
Method
For the Filling:
- Take a pan and place it over a medium flame on the stove.
- Add the olive oil.
- Put the onion and mushroom in the pan and stir them continuously until soft and slightly golden.
- Add the Johnsonville Brat crumbles to the pan mixture. Cook until the brats turn brown.
- Switch off the stove and place the pan aside.
For the Bechamel Sauce:
- Take a saucepan and place it over a medium flame on the stove.
- Add the butter to melt.
- Once the butter has melted, add the flour while continuously stirring.
- Add the milk and whisk until a smooth consistency is attained.
- Boil till the sauce begins to thicken.
- Pour half the sauce into the filling mixture.
- Add the mozzarella cheese and the egg yolks to complete the bechamel sauce with constant stirring and mixing.
For the Cannelloni:
- Cook the cannelloni shells carefully.
- Preheat the oven to 350℉.
- Line the baking tray with parchment paper with some oil sprayed over it.
- Fill the cooked cannelloni with the filling.
- Place the filled cannelloni into the ready baking tray.
- Pour the remaining half of the bechamel sauce over the cannelloni.
- Sprinkle the shredded parmesan cheese and dried oregano over the sauce-covered cannelloni.
- Put the tray into the preheated oven for 45 minutes.
- Remove the tray from the oven once the cheese begins to darken.
- Rest on the counter for 3-5 minutes.
- Serve hot!
Frozen Brats
Frozen Brats require extra time for preparation. First, they have to be brought to room temperature, and then they can be used for cooking.
Cooking frozen brats in the oven is best for an easier clean-up; unlike grilling, many scrubbing is involved after a brat party.
A Recipe – Frozen Brats and Fried Potatoes.
Cooking Time: 40 minutes
Serving Size: 5
Ingredients
For the Fried Potatoes:
- Potatoes – 3 – wedges
- Salt – to taste
- Pepper (optional) – to taste
- Oil – 1 tablespoon
For the Frozen Brats:
- Frozen Brats – 5
- Oil – 1 tablespoon
- Method
For the Fried Potatoes:
- Take a frying pan.
- Pour oil according to your personal preference.
- Add the wedged potatoes.
- Saute them until slightly brown.
- Add salt and pepper (optional) to taste.
- Continue sauteing for 5 minutes after the addition of salt.
- Your steaming hot potato wedges are ready.
- Arrange the Frozen Brats in a single layer in a baking tray, sprayed with a non-sticky liquid.
- Preheat the oven at 350℉.
- Put the arranged Frozen Brats into the preheated oven.
- Continue cooking the Frozen Brats at 350℉ for 20 minutes and flip them once at halftime, i.e., 10 minutes for even cooking.
- Give them an extra 5 minutes if you are not sure about the color they have turned out to be.
- If you want to broil, then add another 10 minutes to cooked Frozen Brats.
- At the end of the cooking time, pull out the tray.
- Check the internal temperature to ensure they are not raw inside.
- Serve them hot with tasty potatoes.
Raw Brats
Raw Brats are easy to cook. They do not have any pre-processes to go through. Just plain jane. It goes about with anything—a good pair up with sauce or vegetable or good old beer/ale.
A Recipe – Raw Brats with Sauerkraut
Cooking Time: 40 minutes
Serving Size: 5
Ingredients
For the Sauerkraut:
- Cabbage – 1 – chopped
- Salt – to taste
For the Raw Brats:
- Raw Brats – 5
- Oil – 2 tablespoons
Method
For the Sauerkraut:
- Mix the chopped cabbage with salt.
- Keep mixing for about 7-10 minutes until the juices of the cabbage ooze out.
- Sauerkraut is ready to eat.
For the Raw Brats:
- Arrange the Raw Brats in a single layer in a baking tray, sprayed with a non-sticky liquid.
- Preheat the oven at 350℉.
- Put the arranged Raw Brats into the preheated oven.
- Continue cooking the Raw Brats at 350℉ for 20 minutes and flip them once at half time, i.e., 10 minutes for even cooking.
- Give them an extra 5 minutes if you are not sure about the color they have turned out to be.
- If you want to broil, then add another 10 minutes to cooked Raw Brats.
- At the end of the cooking time, pull out the tray.
- Check the internal temperature to ensure they are not raw inside.
- Serve them hot with the sour sauerkraut.
Pre-Cooked Brats
Pre-cooked brats have the option of being smoked. Since they are already slightly cooked, a deep cook is not necessary. Furthermore, they do not require a lengthy time to reach the edible state. They are good to collaborate with freshly prepared coleslaw.
A Recipe – Pre-Cooked Brats with Coleslaw
Cooking Time: 40 minutes
Serving Size: 5
Ingredients
For the Coleslaw:
- Coleslaw mix – 1 packet
- Mayonnaise – 3-4 dollops
- Apple Cider Vinegar – 1 tablespoon
- Honey – 2 teaspoons
For the Pre-Cooked Brats:
- Pre-Cooked Brats – 5
- Oil – 2 tablespoons
Method
For the Coleslaw:
- Mix the mayo, vinegar and honey in a bowl.
- Add the coleslaw mix at the end.
- Toss until thoroughly mixed.
- Bright and fresh coleslaw is ready to be devoured.
For the Pre-Cooked Brats:
- In a saucepan, add water and the Pre-cooked Brats.
- Boil the Pre-cooked Brats on a medium-high flame, i.e., until the water begins to produce bubbles.
- Turn down the flame, and let them simmer gently.
- After about 10 minutes, switch off the stove and let them rest.
- Arrange the Brats in a single layer in a baking tray, sprayed with a non-sticky liquid.
- Preheat the oven at 350℉.
- Put the arranged Brats into the preheated oven.
- Continue cooking the Brats at 350℉ for 10 minutes and flip them once at halftime, i.e., 5 minutes for even cooking.
- If you want to broil, then add another 10 minutes to the Brats.
- At the end of the cooking time, pull out the tray.
- Check the internal temperature to ensure they are not raw inside.
- Serve them hot with the refreshing coleslaw at the side.
Turkey Brats
Turkey is an exquisite meat type. Not many people eat it or are fond of it. However, for those who do, it’s definitely on the list of their top favorite. Being a poultry meat, it is often compared with other bird meats.
A Recipe – Turkey Brat Grill Pouch
Cooking Time: 40 minutes
Serving Size: 5
Ingredients
- Turkey Brats – 5 – sliced
- Mini Sweet Peppers – 2
- Onion – 1 – sliced
- Yellow squash – 1 – sliced
- Garlic Powder – 1 teaspoon
- Chives – 1/4 cup
- Parsley – 1/2 cup
- Oil – 2 tablespoons
- Salt – to taste
- Pepper – to taste
Method
- Arrange the Turley Brats in a single layer in a baking tray, sprayed with a non-sticky liquid.
- Add the sweet peppers, sliced onion, squash, garlic, chives, and parsley on top of the Turkey Brat layer.
- Sprinkle salt and pepper.
- Pour the required oil over them in a zig-zag manner.
- Cover each Turkey Brat in a pouch form of aluminum foil. Each pouch should have a sufficient amount of all the ingredients.
- Preheat the oven at 350℉.
- Put the prepared Turkey Brats into the preheated oven.
- Continue cooking the Turkey Brats at 350℉ for 20 minutes and flip them once at halftime, i.e., 10 minutes for even cooking.
- Give them an extra 5 minutes if you are not sure about the color they have turned out to be.
- If you want to broil, then add another 10 minutes to cooked Turkey Brats.
- At the end of the cooking time, pull out the tray.
- Check the internal temperature to ensure they are not raw inside.
- Your Turkey Brat Grilled Pouches are ready to be served hot!
Skinless Brats
Skinless Brats refer to the casings of them being removed. Usually, brats have intestine casings wrapped around them to hold the ground meat together. But in Skinless Brats, this specific outer thin covering is removed. The meat does hold its shape, though.
A Recipe – Skinless Brat Rice Bake
Cooking Time: 40 minutes
Serving Size: 5
Ingredients
- Skinless Brats – 5 – cut into 2-inches each
- Mushrooms – 1 cup – chopped
- Celery – 1/2 cup – cut into 1-inch each
- Carrot – 1 – cut into 1-inch each
- Onion – 1 – sliced
- Thyme – 1 bunch – chopped
- White Rice – 2 cups
- Swiss Cheese – 1 cup – grated
- Olive oil – 2 tablespoons
- Salt – to taste
Method
- Take a skillet and coat it with olive oil.
- Heat the oil on a medium-high flame.
- Once the oil in the skillet is hot enough, add Skinless Brats, mushrooms, celery, carrot, onion, and thyme.
- Keep stirring the ingredients until they are soft.
- Preheat the oven to 350℉.
- Add the white rice and salt and saute for another minute or two.
- Shift the pan from the stove to the preheated oven.
- Let it cook for 20-25 minutes.
- To broil, open the lid, pull the pan out halfway through and cover the top of the pan with swiss cheese; push the pan in and then close the lid. Let it cook for another 5 minutes.
- Cheesy and hot, your Skinless Brat Rice Bake is ready to dig in!
Cheddar Brats
Cheese, even reading the word, makes your salivary glands excited. Imagine that with your favorite brats. What a match! Cheddar Brats is the definition of a beautiful marriage of meat and cheese.
A Recipe – Cheesy Cheddar Brat Casserole
Cooking Time: 50 minutes
Serving Size: 5
Ingredients
- Regular Brats – 5 – chopped into average slices
- Potatoes – 2 – cubed
- Green Beans – 1 cup
- Mushroom broth – 1 cup
- Cheddar cheese – 2 cups
- Onion – 1 – chopped
- Oil – 2 tablespoons
- Salt – to taste
- Pepper – to taste
Method
- Preheat the oven to 350℉.
- Take a casserole dish and spread its bottom with oil.
- Add the Brats, potatoes, beans, mushroom broth, onion, salt, and pepper.
- Sprinkle the cheddar cheese liberally over the base like a lid.
- Place the casserole dish into the oven.
- After about 45 minutes, the cheese will begin to crisp up and brown; and that is your cue that it is done.
- Your cheesy guilty pleasure is done and ready!
A multitude of oven brat cooking recipes exist around the world. Each region has its touch added to the original recipe.
Over the years, brat culture has seen many twists and turns and has now molded into what it is today-Hot and ready on the streets.
We hope that this article makes Cooking brats in the oven a lot easier for you.
Wishing you a great brat cooking in the oven!